


I am halfway through my Java stack course and last week we learned CRUD. Finally! I can create, read, update, and delete information from a database for a Java project!
Let's summarize the Spring MVC process using my CRUD assignment that tracks expenses.
Spring MVC
MVC stands for models, views, and controllers. Learning the MVC design pattern in any language is important because modularized projects make development smoother, maintainable, and scalable. This is crucial for large teams and large applications.
With Spring MVC, the model is made up of the Persistence Layer (consisting of Domain and Repository models) and the Service Layer model. Each is in its own package. We will go into these as we go through the project.
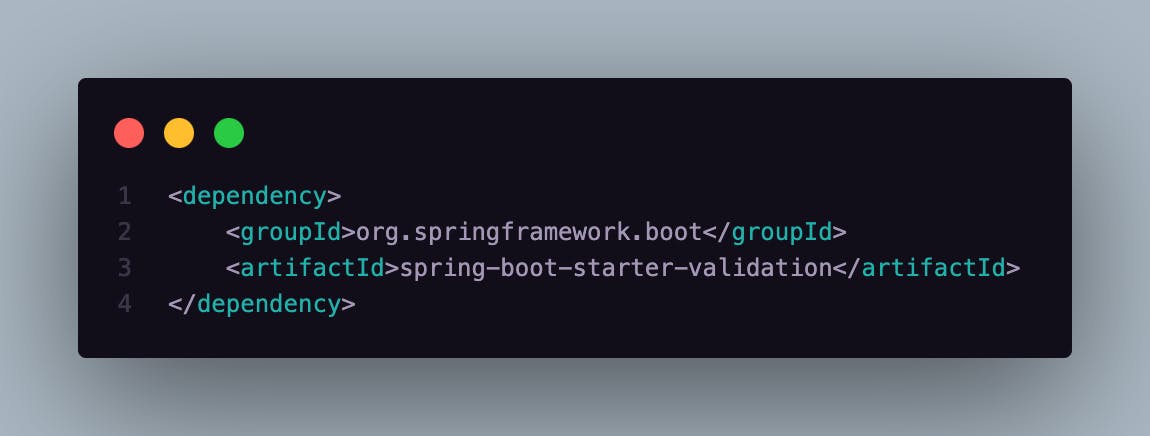
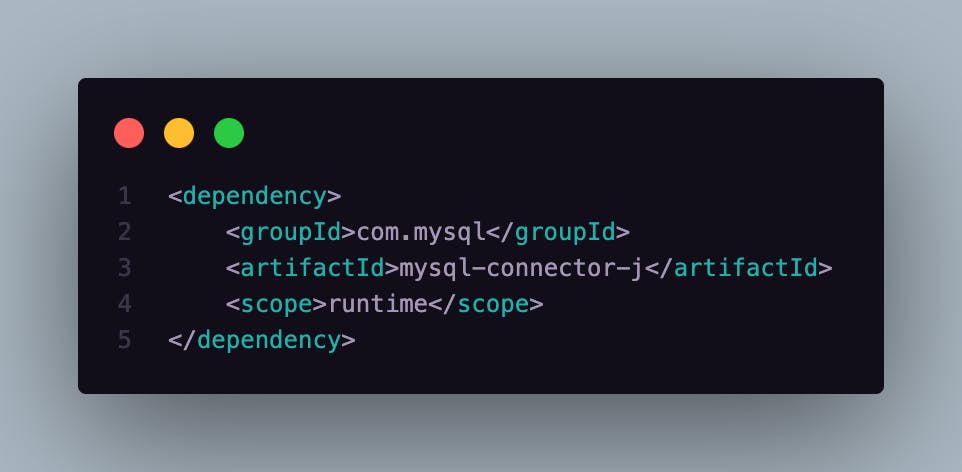
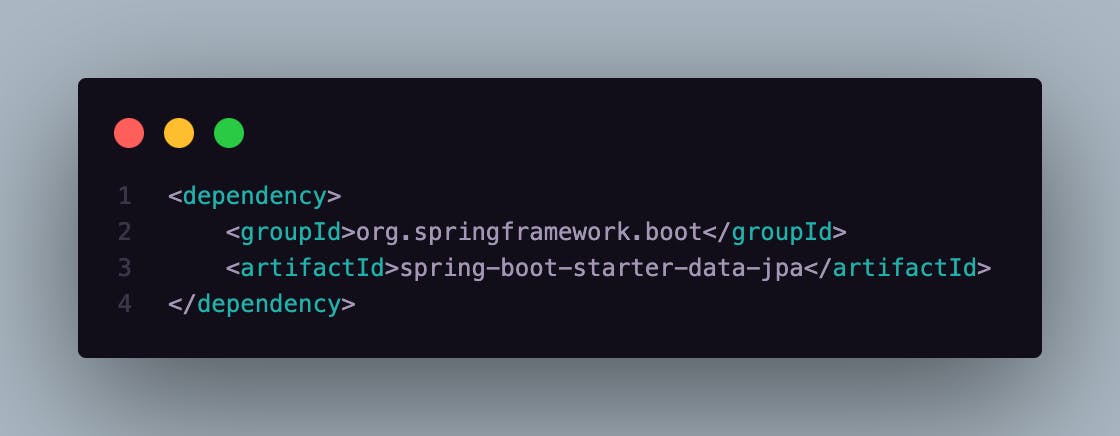
Dependencies
I discussed the main dependencies in my blog Submitting a Form but I needed to add additional dependencies to the pom.xml file for the validations, database connection, and JPA:
Views
I created 3 templates for my views. One is to show the dashboard where you can see all expenses and also add new expenses, one to edit an expense, and one to view expense details. You can check out the video at the end of the article where you can see each template and how the project works. Keep in mind, it is a bare-bones project with minimal styling, using bootstrap, to mainly focus on the CRUD functions.
The main thing for the templates is having the HTML tags at the top of your templates to be able to use core tags as well as form tags for Java. You can read about core tags here at w3schools and form tags here at geeksforgeeks. I also included, as always, the tag for Java and also a tag to render errors on PUT requests:
%@ page language="java" contentType="text/html; charset=UTF-8" pageEncoding="UTF-8"%>
%@ page isErrorPage="true" %>
I also had to add a property to the application.properties file to later use update and delete methods which are hidden in the HTML:
inputsspring.mvc.hiddenmethod.filter.enabled=true
Model: Domain
Before creating controllers I needed to set up my Expense Class which will be the Domain Model. Here is where we tell the application to build a schema table for us. To create a table, I needed to first connect it to my database and create a schema for it.
This means the following code was added to the application.properties file for database connection:
spring.datasource.url=jdbc:mysql://localhost:3306/SchemaName
spring.datasource.username=YourUsername
spring.datasource.password=YourPassword
spring.jpa.hibernate.ddl-auto=update
Now that it can connect to MySQL, I built a table with validations in the Expense model and created a class for Expense making sure I imported each annotation:

Next, I added the getters and setters similar to how I did it for The Barista project. In addition, I needed to include persistence annotations for creating and updating to save date information:

Controllers
Now that I had my Expense class, I can start creating my controllers to manage each route. I also needed to import every annotation I was using. I used the following: GetMapping, Autowired, PostMapping, PutMapping, and RequestMapping.

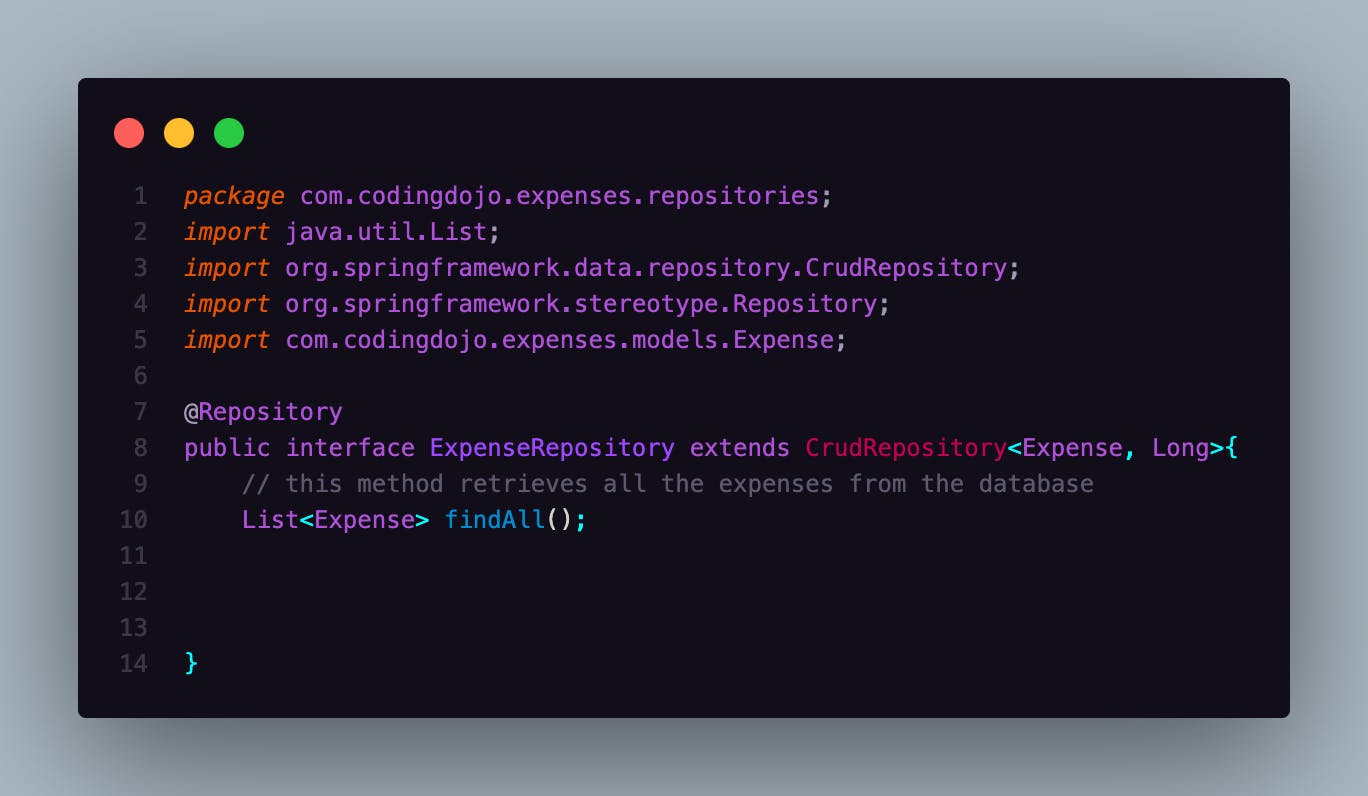
Model: Repository
Moving on to the rest of the models, the repository model will give us access to our data from the database and looks like this for my expense project:
Model: Service
Most of my time was spent here in the Service model, where all the business logic goes:

Video Demo
Below is a video demo. The project is not perfect in the HTML form details and some of the validations could be corrected or improved. Even as a bare-bones project, with minimal styling, I think it shows the CRUD functions well. I will be learning how to incorporate login and registration, relationships, and API's this week and next week in preparation for a full stack CRUD Java exam project.